


How to Choose the Best Patch Digitizing Provider for Your Design
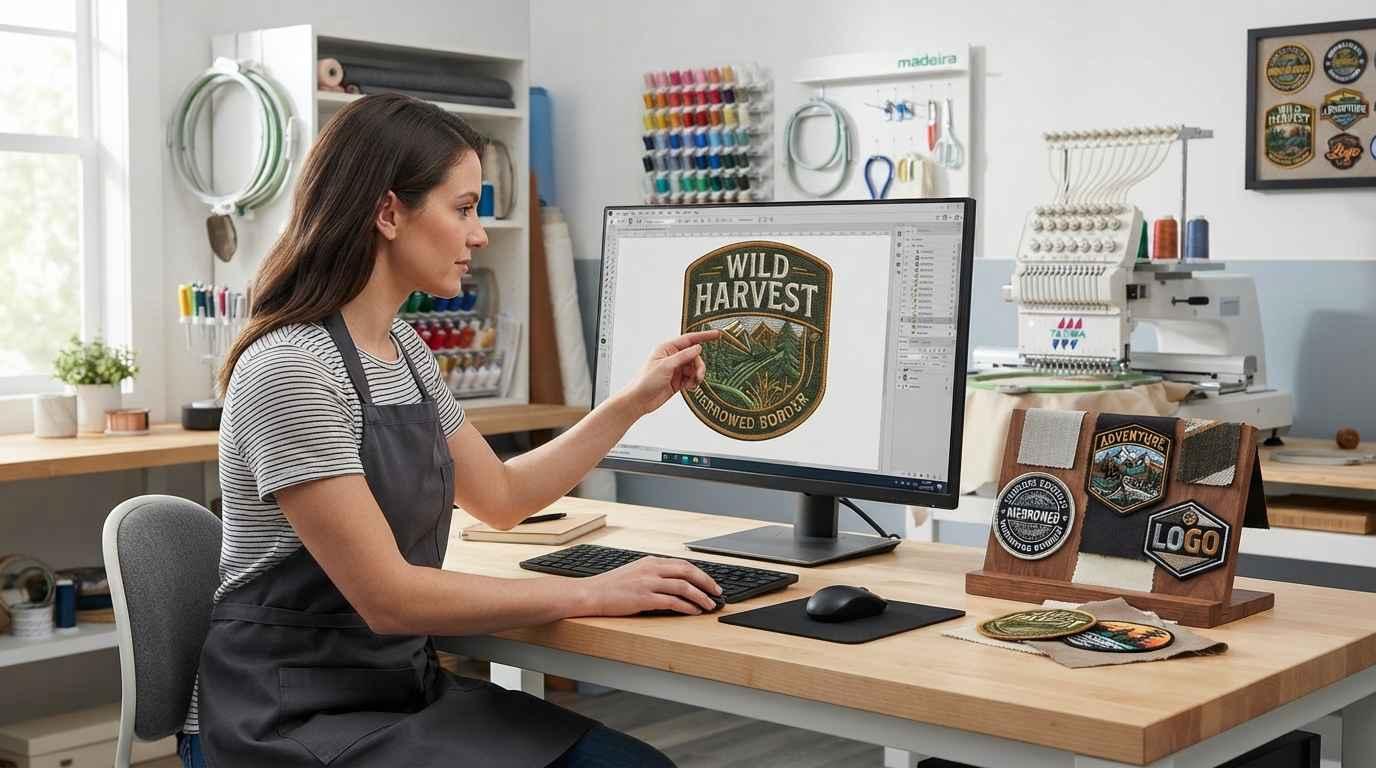
A custom patch can turn a logo, illustration, name, or graphic into a useful embroidered product. However, the quality of the final patch depends heavily on how the artwork is prepared for stitching. Choosing the best patch digitizing provider is therefore an important step before placing an order.
Patch digitizing is different from simply converting an image into an embroidery file. The digitizer needs to consider stitch types, density, borders, underlay, fabric, patch size, thread direction, and the way the design will be produced.
A provider may offer low prices and fast turnaround, but those factors alone do not tell you whether the final embroidery file will work properly. You need to evaluate the provider's experience, file quality, communication, revisions, and ability to handle your specific design.
This guide explains what to look for when choosing a patch digitizing provider and how to compare different services before submitting your artwork.
What Is Patch Digitizing?
Patch digitizing is the process of converting artwork into a machine-readable embroidery file designed specifically for creating an embroidered patch.
The digitizer analyzes the original artwork and determines how each element should be created with stitches. This can involve selecting satin stitches, fill stitches, running stitches, borders, underlay, stitch direction, and appropriate density.
The final file needs to work with the embroidery machine and the materials being used to produce the patch.
A design that looks good as a JPG or PNG does not automatically mean it will produce a good embroidered patch. Artwork must be planned for the physical characteristics of embroidery.
Why Choosing the Right Provider Matters
The quality of digitizing can affect the appearance, durability, and production efficiency of your patches.
Poor digitizing may result in issues such as:
- Uneven stitch coverage
- Small details becoming unclear
- Poor lettering
- Excessive thread density
- Weak or irregular borders
- Thread breaks
- Fabric distortion
- Incorrect stitch direction
A skilled provider understands these challenges and prepares the embroidery file according to the design and intended patch application.
1. Review the Provider's Patch Digitizing Experience
One of the first things to check is whether the provider has specific experience with patches.
General embroidery digitizing experience is useful, but patch designs can have their own requirements. A patch often needs a defined border, clear internal elements, suitable density, and a structure that works with the chosen patch material.
Look for examples that demonstrate experience with different patch styles, sizes, shapes, and artwork types.
A provider that regularly handles patches is more likely to understand the production requirements involved.
2. Check the Portfolio Carefully
A portfolio can provide useful information about a digitizer's actual work.
Do not only look at whether the sample designs are attractive. Pay attention to technical details.
Look for:
- Clean lettering
- Smooth borders
- Consistent stitch coverage
- Clear small elements
- Good thread direction
- Proper separation between design areas
- Neat edges
If possible, review examples at a close size rather than relying only on small preview images.
A strong portfolio should show different types of artwork rather than several nearly identical designs.
3. Make Sure They Understand Your Artwork
Every design presents different digitizing challenges.
A simple company logo may require a straightforward stitch structure, while a detailed illustration can require considerable simplification.
Before ordering, provide the original artwork and explain important requirements such as:
- Final patch dimensions
- Patch shape
- Intended fabric
- Number of thread colors
- Desired border
- Type of patch
- Machine format
- Intended application
A good provider should be able to review the artwork and explain any limitations before the file is created.
4. Ask About the Final Patch Size
Patch size has a direct effect on how much detail can be reproduced.
For example, a design intended for a large jacket patch may support more detail than a small patch intended for a cap or bag.
If the provider does not ask about the intended size, this can be a reason to request clarification before proceeding.
The digitizer may need to simplify certain elements or adjust lettering depending on the final dimensions.
5. Check Which Embroidery Formats Are Available
Different embroidery machines can require different file formats.
Common machine formats include DST, PES, JEF, and HUS, although requirements vary depending on the machine.
Before placing an order, confirm that the provider can supply the format required by your embroidery machine.
If you are working with a commercial embroidery shop, ask the machine operator which format is needed before requesting the final file.
6. Evaluate Stitch Quality
A high-quality patch digitizing file should use stitches efficiently.
The goal is not simply to increase stitch count. Excessive stitches can create unnecessary density, longer production times, and potential fabric problems.
The digitizer should select appropriate stitch types and directions according to each part of the design.
For example, satin stitches can work well for certain borders and lettering, while fill stitches can cover larger areas. Running stitches may be useful for fine lines or specific details.
The correct choice depends on the artwork and its intended size.
7. Look at Border Quality
The border is an important part of many embroidered patches.
A clean border can help define the patch shape and provide a finished appearance. If the border is uneven, too thin, poorly positioned, or incorrectly digitized, the final patch may look unfinished.
Ask how the provider handles patch borders and whether the border is included in the digitizing process according to your production method.
8. Check How Small Details Are Handled
Small details can be one of the most difficult parts of patch digitizing.
Tiny letters, narrow gaps, thin outlines, small facial features, and detailed illustrations may not reproduce accurately when converted into stitches.
An experienced digitizer should know when a detail needs to be simplified rather than attempting to reproduce every pixel of the original artwork.
This is one reason communication with the provider matters before digitizing begins.
9. Ask About Underlay and Stitch Density
Underlay provides a foundation beneath the visible embroidery stitches. It can help support the design and improve stitch coverage depending on the fabric and application.
Stitch density also needs to be appropriate. Too little density can leave gaps, while excessive density can create unnecessary bulk and fabric distortion.
The correct settings depend on factors such as:
- Design size
- Fabric
- Thread type
- Stitch type
- Design structure
- Patch production method
A professional digitizer should account for these factors instead of applying identical settings to every design.
10. Compare Turnaround Time With Quality
Fast service can be useful when you have production deadlines, but speed should not be the only selection criterion.
A provider promising extremely fast delivery may still require revisions if the file has not been properly prepared.
Instead of asking only, “How fast can I get the file?” ask how the provider handles quality checks and revisions.
A reasonable turnaround combined with careful digitizing can save time later by reducing production problems.
11. Review the Revision Policy
Even a well-prepared design may require adjustments after a test stitch.
Before ordering, check whether revisions are included and what the provider considers a revision.
For example, you may need changes to:
- Letter size
- Stitch density
- Thread colors
- Border structure
- Design size
- Stitch direction
A clear revision policy can make the process easier if the first version needs adjustments.
12. Ask Whether Test Stitching Is Recommended
Test stitching can reveal problems that are not obvious in a digital preview.
The design may look correct on a computer but behave differently on the actual patch material.
A test can help identify:
- Thread breaks
- Poor coverage
- Small unreadable details
- Excessive density
- Uneven borders
- Fabric distortion
If the design is important or contains complex artwork, a test stitch can be a valuable quality-control step.
13. Consider Communication and Customer Support
Good communication can prevent many production issues.
A provider should be able to answer questions about artwork, size, file formats, stitch limitations, and revisions.
Pay attention to whether the provider asks relevant questions about your project.
For example, asking about the final size and embroidery machine can indicate that the provider is considering the actual production requirements rather than simply converting the artwork.
14. Compare Pricing Carefully
Price is an important factor, particularly for small businesses, but the cheapest option is not always the most economical.
A low-cost file may require multiple revisions or produce poor embroidery results. This can increase production time and material waste.
When comparing prices, consider what is included.
Check whether the quoted price covers:
- Original digitizing
- Required machine format
- Revisions
- Minor artwork adjustments
- Customer support
- Test-stitch adjustments, if offered
Compare the complete service rather than looking only at the initial price.
15. Check Customer Reviews
Customer reviews can provide additional information about a provider's reliability.
Look for comments related to actual embroidery results rather than general statements about customer service.
Useful review details may mention:
- File quality
- Communication
- Turnaround time
- Revisions
- Small-detail handling
- Patch production results
A few detailed reviews can often provide more useful information than a large number of short ratings with no explanation.
16. Make Sure the Provider Can Handle Your Design Type
Not every patch design has the same requirements.
You may need digitizing for:
- Company logos
- Sports patches
- Name patches
- Uniform patches
- Motorcycle-style patches
- Character artwork
- Text-based patches
- Custom shapes
- Detailed illustrations
Before choosing a provider, make sure their portfolio and service experience match the type of design you want to produce.
Questions to Ask Before Ordering
A short conversation before ordering can help you avoid unnecessary problems.
Consider asking:
- Can you review my artwork before starting?
- Which embroidery formats do you provide?
- Can you digitize the design for my exact patch size?
- Are revisions included?
- Do you recommend simplifying any artwork details?
- Can you work with my required thread colors?
- How do you handle patch borders?
- What turnaround time should I expect?
- Is test stitching recommended for my design?
The answers can help you compare providers based on their actual workflow rather than marketing claims.
Red Flags When Choosing a Patch Digitizing Provider
Some warning signs deserve attention before placing an order.
Be cautious if a provider:
- Does not ask about your final design size
- Cannot explain the required machine format
- Promises identical results for every type of artwork
- Offers no clear revision process
- Has very limited patch examples
- Cannot explain how complex details will be handled
- Focuses only on low pricing
- Provides unclear answers about the final file
These factors do not automatically mean the service is poor, but they are reasons to ask more questions before proceeding.
How to Prepare Your Design Before Submission
You can make the digitizing process easier by providing the best artwork available.
Whenever possible, send a high-quality version of the original design. Vector artwork can be especially useful when available because shapes and text can be edited without the limitations of a low-resolution image.
Also provide the exact patch dimensions and explain where the patch will be used.
If you have specific thread colors or a preferred border style, communicate those requirements before digitizing begins.
Best Patch Digitizing Provider: What Should You Prioritize?
When comparing providers, focus on the complete workflow rather than one feature.
A reliable provider should combine:
- Patch-specific experience
- Strong digitizing skills
- Clear communication
- Suitable stitch planning
- Appropriate density
- Good lettering
- Clean borders
- Useful revisions
- Compatible machine formats
- Reasonable turnaround
- Consistent customer support
The right provider should be able to explain how your particular artwork will be prepared for embroidery.
Final Checklist Before Placing Your Order
Before selecting a provider, review these points:
Artwork: Is the provider experienced with your design type?
Size: Have you provided the exact final patch dimensions?
Machine format: Do they offer the format required by your machine?
Quality: Does their portfolio show clean, well-structured embroidery?
Revisions: Is the revision policy clear?
Communication: Do they ask useful questions about your project?
Price: Does the price include the services you actually need?
Testing: Can the design be reviewed through test stitching when necessary?
If most of these questions have clear answers, you have a stronger basis for selecting a patch digitizing service.
Conclusion
Choosing the best patch digitizing provider requires more than comparing prices or turnaround times. Review the provider's patch experience, portfolio, stitch quality, communication, revision policy, file formats, and ability to prepare your specific artwork for its intended size and material.
A well-prepared digitizing file can help reduce production problems and produce cleaner, more consistent embroidered patches. iDigitize can support businesses that need professionally prepared embroidery files for custom patch designs and other embroidery applications.
FAQs
Q1. What should I look for in the best patch digitizing provider?
Look for patch-specific experience, a strong portfolio, clear communication, suitable stitch planning, compatible machine formats, reasonable turnaround, and a clear revision policy.
Q2. How much does patch digitizing cost?
Pricing varies according to design complexity, size, stitch requirements, and provider. It is better to compare the complete service rather than choosing based only on the lowest price.
Q3. What file should I send for patch digitizing?
Send the highest-quality artwork available. JPG, PNG, PDF, SVG, and EPS are common formats, but the best option depends on your original artwork and the provider's workflow.
Q4. Why does patch size matter in digitizing?
Patch size determines how much detail can be reproduced. Small patches may require simplified artwork and larger lettering to maintain readability.
Q5. Should I request a test stitch?
A test stitch can be useful for complex or important designs because it can reveal problems with density, borders, small details, and fabric interaction before full production.
Q6. Can one embroidery file work for every patch size?
Not always. A design may require adjustments or separate versions for significantly different sizes because small areas cannot reproduce the same level of detail as larger patches.

 English
 Arabic
 French
 Spanish
 Portuguese
 Deutsch
 Turkish
 Dutch
Dutch
 Italiano
 Romaian
 Portuguese (Brazil)
 Greek
Greek
 ไทย
ไทย