


What Makes Professional Embroidery Designs Suitable for Machine Stitching?
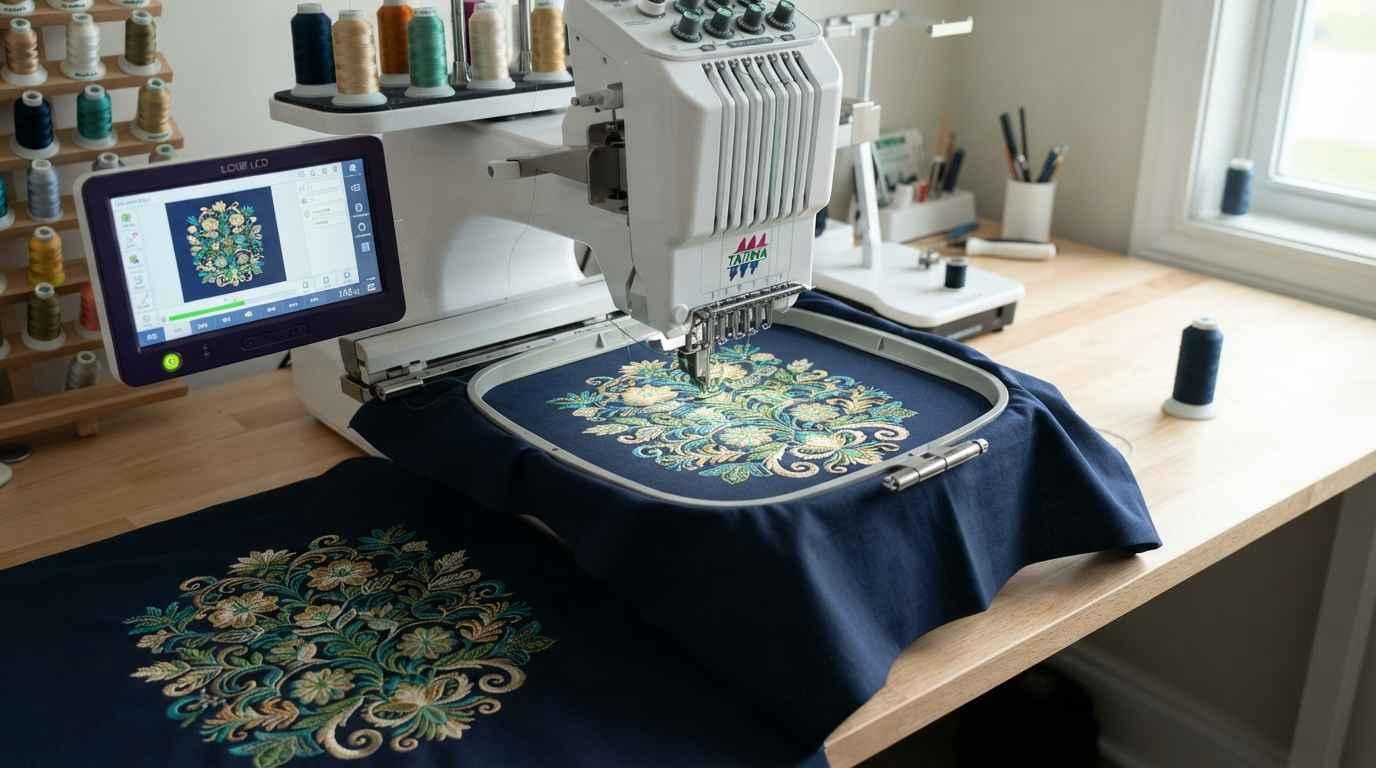
Professional embroidery designs are created to produce clean, consistent results when stitched by an embroidery machine. Unlike a simple image or digital drawing, a machine-ready embroidery design contains specific instructions that control stitch direction, stitch density, thread changes, and the sequence of embroidery operations. These details help the machine reproduce artwork on fabric with greater accuracy.
Choosing suitable professional embroidery designs can help reduce thread breaks, fabric puckering, uneven lettering, and other common stitching problems. Whether you are decorating garments, producing business logos, creating custom patches, or personalizing accessories, the design must work with the machine, fabric, thread, and final embroidery size.
This guide explains the main features that make an embroidery design suitable for machine stitching and what to check before using a design in production.
What Are Professional Embroidery Designs?
Professional embroidery designs are artwork files prepared for machine embroidery. They contain stitch data that tells a compatible embroidery machine how to reproduce a design on fabric.
A regular JPG or PNG image shows visual information, but it does not contain the stitch instructions needed by an embroidery machine. The artwork must be digitized before it can be stitched using a machine-compatible format.
Professional designs take several production factors into account, including fabric type, design dimensions, stitch direction, thread thickness, and the details that can be reproduced with embroidery.
For example, a business logo with small text and thin outlines may look clear on a computer screen. However, if the stitch paths are poorly planned, the lettering may become difficult to read once embroidered. Proper digitizing helps adapt the artwork to the limitations of thread and fabric.
1. Accurate Stitch Direction and Path Planning
Stitch direction affects the appearance, texture, and coverage of an embroidered design. Professional digitizing assigns stitch angles according to the shape and purpose of each design element.
For example, lettering may require satin stitches, while larger shapes may use fill stitches. Changing stitch angles between selected areas can create visual separation and improve the finished appearance.
Path planning is equally important. The order in which different sections are stitched affects machine movement, thread changes, jump stitches, and production time. A carefully planned sequence can reduce unnecessary movement and help keep the embroidery process organized.
When reviewing a design, check whether its stitch sequence is appropriate for the artwork and whether excessive jumps or unnecessary trims could affect production.
2. Suitable Stitch Density
Stitch density refers to how closely stitches are placed within an embroidered area. It must be adjusted according to the fabric, thread, stitch type, and size of the design.
Excessive density can cause thread breaks, stiff embroidery, fabric damage, or puckering. If density is too low, the fabric may show through areas that should have adequate coverage.
Professional embroidery designs use density settings suited to the intended material and design elements. A dense logo on a thick jacket, for instance, may need different settings from a lightweight design on a fine garment.
There is no single density setting that works for every project. The correct value depends on the material and the way the design will be stitched, so testing is important before producing multiple items.
3. Proper Underlay Stitches
Underlay stitches are placed beneath the main stitches to help stabilize the fabric and support the visible embroidery. They can improve coverage, reduce distortion, and help keep design elements in position.
The type of underlay depends on the fabric, design shape, and main stitch type. A large fill area may need a different underlay approach from narrow lettering or a small satin column.
Without suitable underlay, embroidery may shift during stitching or fail to cover the fabric consistently. Too much underlay, however, can create unnecessary bulk and affect the final texture.
Professional digitizing considers how the foundation stitches will support the visible stitches without adding more material than necessary.
4. Correct Design Size and Stitch Width
An embroidery design must be prepared for its intended dimensions. Reducing a large design to a much smaller size can make fine details disappear, close small spaces, and cause lettering to become difficult to read.
Enlarging a design can also create problems if its stitch structure is not adjusted for the new dimensions. Simply scaling a stitch file does not always produce a suitable result because stitch lengths, densities, and object settings may need to be revised.
Satin stitches are especially sensitive to width. Very narrow columns may not provide enough coverage, while excessively wide columns may require another stitch approach.
Before stitching, confirm that the design dimensions fit the garment or item and that small details remain practical at the selected size.
5. Compatibility With Embroidery Machines
Embroidery machines support specific file formats, depending on the manufacturer and model. A professional design must be saved in a format the intended machine can read.
Common embroidery formats include:
-
DST: Commonly used in commercial embroidery production.
-
PES: Associated with many Brother and Baby Lock embroidery machines.
-
JEF: Used by many Janome embroidery machines.
-
EXP: Used by certain commercial and home embroidery systems.
-
HUS: Associated with selected Husqvarna Viking machines.
-
VP3: Used by various Pfaff and Husqvarna Viking systems.
These formats are not interchangeable in every situation. Before ordering or transferring a file, check your machine's manual or manufacturer documentation to confirm compatibility.
Also verify the design's dimensions, color-change instructions, hoop requirements, and other machine-specific limitations. A compatible extension alone does not guarantee that a file is correctly digitized.
6. Clear Details and Readable Lettering
Small lettering, narrow outlines, and intricate shapes require special attention during digitizing. Thread has physical thickness, and fabric can shift or stretch during stitching. As a result, details that appear sharp on a screen may not reproduce exactly in embroidery.
Professional embroidery designs account for these limitations by adjusting letter spacing, stitch direction, column width, and detail size where necessary.
For small text, increasing the spacing between letters or simplifying complicated shapes may improve readability. Thin lines may need to be widened, and tiny gaps may need adjustment to prevent them from closing during stitching.
The goal is to preserve the important features of the original artwork while adapting it to the embroidery process.
7. Appropriate Fabric and Stabilizer Selection
Even a well-digitized design can produce poor results if it is stitched on unsuitable fabric or without adequate stabilization.
Stretchy fabrics, lightweight knits, denim, caps, towels, and structured jackets behave differently under the needle. Each material can affect stitch formation, design movement, and final coverage.
A stabilizer supports the fabric during embroidery. The appropriate type and weight depend on the material, design density, garment construction, and whether the stabilizer should remain beneath the stitches or be removed afterward.
For example, stretchy fabric often requires stronger stabilization than a stable woven material. Towels may need a suitable topping to prevent stitches from sinking into the pile.
Before production, consider the complete setup: fabric, stabilizer, hooping method, needle, thread, and design file. These elements work together to determine the final result.
8. Efficient Color Changes and Machine Movement
Many embroidery designs contain multiple thread colors. The stitch sequence should organize these colors logically and avoid unnecessary stops or machine movements.
Poor sequencing may create excessive thread changes, long jump stitches, extra trimming, or visible connections between design areas. These issues can increase production time and affect the finished embroidery.
Professional digitizing considers how the machine will move between sections. Where appropriate, related areas can be stitched in a sequence that limits unnecessary changes while preserving the intended appearance.
For business logos and repeated production orders, efficient sequencing can be particularly helpful because even small reductions in unnecessary machine operations may save time across a larger batch.
9. Clean Edges and Reliable Coverage
The edges of letters, shapes, and filled areas contribute significantly to embroidery quality. Uneven outlines, exposed fabric, loose connections, and overlapping stitches can make a design look unfinished.
Professional designs use suitable stitch types and carefully planned boundaries to help produce consistent edges. Pull compensation may also be needed because stitches can pull fabric inward as they form. This adjustment helps account for fabric movement and can reduce gaps between adjoining elements.
The correct approach depends on the material and design geometry. A solution that works for a compact logo on a firm fabric may not work equally well on a stretchy garment.
Inspect edge quality during a sample stitch-out, particularly around small letters, curved shapes, narrow columns, and adjoining color areas.
10. Testing Before Final Production
A digital preview can help identify obvious issues, but it cannot show every problem that may occur during actual embroidery. A sample stitch-out is one of the most useful ways to evaluate a design before producing a large quantity.
During testing, check for thread breaks, puckering, gaps, uneven coverage, unreadable lettering, loose stitches, and unnecessary trims. Also inspect whether the design remains aligned and whether the finished size suits the item.
If problems appear, review the digitizing settings and the physical embroidery setup. The cause may involve stitch density, underlay, fabric tension, stabilizer selection, needle choice, hooping, or machine settings rather than the artwork alone.
For repeat orders, record the successful settings so that future production can follow a consistent process.
Common Mistakes That Affect Machine Stitching
Several problems can occur when an unsuitable design is sent directly to an embroidery machine.
Using a regular image as an embroidery file: JPG and PNG images do not contain machine stitch instructions. They generally need to be digitized before stitching.
Ignoring the final design dimensions: Details that work at a large size may fail when reduced. Always check the design at its intended dimensions.
Using the same settings for every fabric: Different materials need different stabilization and stitch approaches. A single setup may not work for all garments.
Choosing a file based only on its extension: A DST or PES file can still contain poorly planned stitches. File compatibility and stitch quality are separate considerations.
Skipping the sample stitch-out: Testing can reveal issues that are difficult to predict from an on-screen preview alone.
Avoiding these mistakes helps improve production consistency and reduces the risk of wasting fabric, thread, and machine time.
How to Choose Professional Embroidery Designs for Your Project
Before using a design, consider where it will be stitched, how large it needs to be, and what result you expect.
Start by confirming that the design suits the intended garment or item. A cap logo may need a different stitch plan from a large jacket-back graphic, even when both use similar artwork.
Next, verify the required file format and machine compatibility. Check whether the design contains readable lettering, suitable stitch density, appropriate underlay, and a logical stitch sequence. If the file is being supplied by a digitizing provider, share details about the fabric, final dimensions, machine type, and intended application.
Finally, request a revision or test file when necessary, and evaluate a sample before starting bulk production. These steps help ensure that the design is suitable for the real embroidery setup rather than just a digital preview.
When Should You Use Professional Embroidery Digitizing Services?
Professional digitizing can be useful when a design contains detailed artwork, small lettering, curved outlines, multiple colors, or elements that need to be stitched on challenging materials.
It is also worth considering when a design must be prepared for a particular machine, garment, or production quantity. An experienced digitizer can adjust stitch types, density, underlay, sequencing, and other settings to suit the job.
Before submitting artwork, provide the clearest available image, the required design size, the fabric or item type, the target embroidery machine, and the preferred file format. Clear instructions make it easier to prepare a suitable file and reduce avoidable revisions.
For projects requiring machine-ready embroidery files, iDigitize provides embroidery digitizing services intended to help convert artwork into files prepared for machine stitching.
Conclusion
Professional embroidery designs are suitable for machine stitching when their stitch structure, density, underlay, dimensions, and sequencing are planned for the intended fabric and machine. File compatibility, readable details, appropriate stabilization, and sample testing also contribute to a reliable result.
A design that looks good on a screen is not necessarily ready for production. Reviewing the stitch plan, confirming machine requirements, and testing the file on the actual material can help reduce common embroidery problems and improve consistency across finished items.
By checking these factors before production, you can make better decisions about your embroidery files and prepare your projects for more reliable stitching.
Frequently Asked Questions
Q1. What makes an embroidery design suitable for machine stitching?
A suitable design has correctly planned stitch paths, appropriate density and underlay, practical dimensions, and a file format supported by the embroidery machine. It should also be prepared for the intended fabric and tested when possible.
Q2. Are professional embroidery designs different from regular images?
Yes. Regular images such as JPG and PNG files display artwork but do not contain the stitch instructions required by an embroidery machine. Machine-ready embroidery files contain the necessary stitch data.
Q3. Which file format is best for machine embroidery?
There is no single best format for every machine. DST, PES, JEF, EXP, HUS, and VP3 are common options, but the correct choice depends on the machine model and its supported formats.
Q4. Why does embroidery fabric pucker?
Puckering can result from excessive stitch density, insufficient stabilization, incorrect hooping, fabric movement, or unsuitable digitizing settings. Checking both the design file and the embroidery setup can help identify the cause.
Q5. Can I resize an embroidery design without changing its quality?
Small changes may be possible, but substantial resizing can affect stitch lengths, density, lettering, and fine details. A design may need to be adjusted or redigitized for its new dimensions.
Q6. Why is underlay important in embroidery digitizing?
Underlay provides a foundation beneath the visible stitches. When properly selected, it can support the fabric, improve coverage, and help reduce distortion.
Q7. Should I test an embroidery design before bulk production?
Yes. A sample stitch-out helps reveal issues with coverage, lettering, thread breaks, fabric distortion, and alignment before the design is used on multiple items.

 English
 Arabic
 French
 Spanish
 Portuguese
 Deutsch
 Turkish
 Dutch
Dutch
 Italiano
 Russian
 Romaian
 Portuguese (Brazil)
 ไทย
ไทย