As the tax season approaches, efficiently handling 1099 & 1096 forms in QuickBooks Desktop is crucial for small business owners. Whether you are a seasoned accountant or managing payroll for your first time, knowing how to print form 1099 and 1096 in QuickBooks Desktop can save you hours of stress. This guide will walk you through every step—from preparation to printing—ensuring your forms are IRS-compliant.
Learn how to print form 1099 and 1096 in QuickBooks Desktop 2026 easily. Call +1(866)500-0076 for support and step-by-step guidance for accurate filing.
Why Printing 1099 & 1096 Forms in QuickBooks Desktop Matters
Before diving into the process, it’s essential to understand why these forms are so important:
- Form 1099 reports non-employee compensation, rent, or miscellaneous income to the IRS.
- Form 1096 acts as a summary transmittal form when submitting paper 1099 forms.
- Filing these forms correctly avoids IRS penalties and ensures your contractors and vendors receive accurate records.
QuickBooks Desktop makes this process smoother than manual entries, but you still need a systematic approach.
Preparation Before Printing
To successfully print form 1099 and 1096 in QuickBooks Desktop, you must complete a few preparation steps:
- Update QuickBooks Desktop: Ensure you have the latest version of QuickBooks Desktop 2026 installed. Updates often include the latest tax forms and IRS compliance rules.
- Verify Vendor Information: Confirm that your vendors’ names, addresses, and Tax Identification Numbers (TINs) are accurate.
- Check Payment Categories: Only payments categorized correctly in QuickBooks will appear on your 1099 forms. Use the 1099 setup wizard to map accounts.
- Backup Your Data: Always create a backup before printing tax forms to prevent accidental data loss.
Step-by-Step Guide to Print 1099 & 1096 Forms in QuickBooks Desktop
Follow these steps to print form 1099 and 1096 in QuickBooks Desktop efficiently:
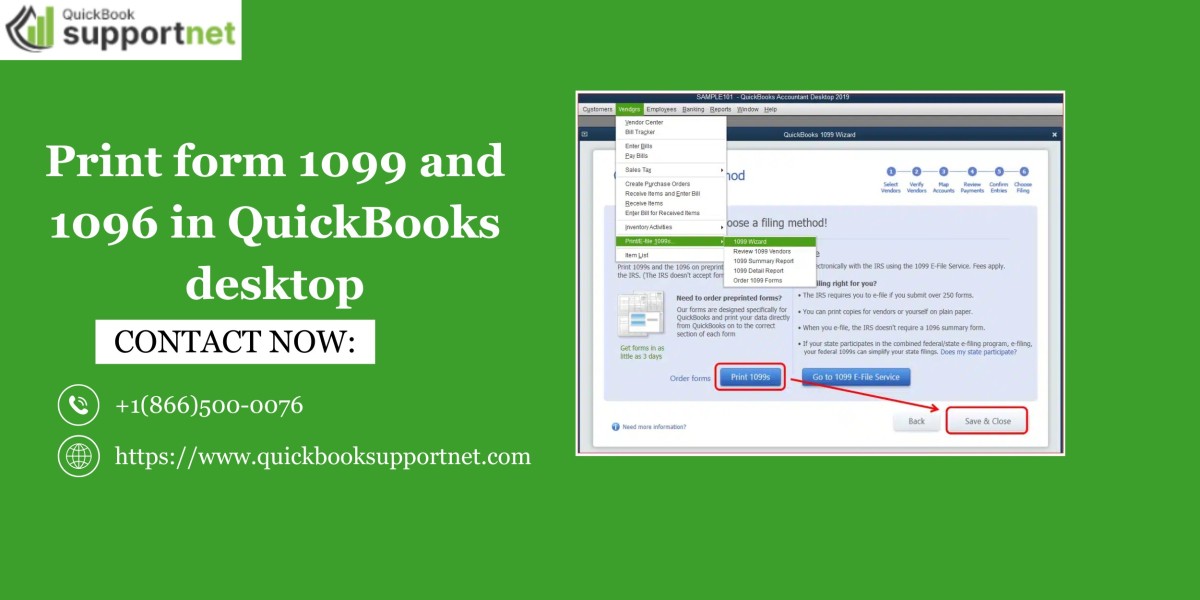
Step 1: Access the 1099 Wizard
- Go to Employees > Vendors > Print 1099s.
- Select the tax year 2026.
Step 2: Verify Vendor Payments
- QuickBooks will show a list of vendors eligible for 1099 reporting.
- Review amounts and categories carefully to avoid errors.
Step 3: Choose Print Options
- You can choose Print 1099 forms on pre-printed forms or print on blank paper for e-filing.
- Check Print 1096 form QuickBooks Desktop option if you plan to submit paper forms.
Step 4: Preview Forms
- Click Preview 1099s to ensure accuracy.
- Look for missing TINs or incorrect totals.
Step 5: Print Forms
- Insert the appropriate IRS-approved forms into your printer.
- Click Print and save a copy for your records.
- For multiple copies, QuickBooks allows batch printing to save time.
Step 6: Filing
- Submit printed forms to the IRS or e-file via QuickBooks.
- Ensure vendors receive their 1099 copies before the IRS deadline.
Tips for Efficient 1099 & 1096 Printing
To make the process even smoother:
- Use QuickBooks Desktop Free Trial to test printing before committing.
- Download pre-formatted forms from QuickBooks Desktop for easier alignment.
- Schedule printing early to avoid last-minute errors and IRS penalties.
- Check for updates regularly: Tax laws and forms may change each year.
Common Errors to Avoid
- Incorrect TINs or addresses: These cause IRS rejections.
- Misclassified payments: Only certain types of payments require 1099 reporting.
- Late submissions: Filing after the deadline can result in fines.
- Using wrong form versions: Always use the latest 2026-approved forms for filing.
Benefits of Using QuickBooks Desktop for Tax Forms
- Accuracy: Reduces errors with automated calculations.
- Time-Saving: Batch printing multiple 1099s and the 1096 form.
- Compliance: Updated forms ensure IRS compliance.
- Records Management: Easy storage of copies for future reference.
Additional Feature: QuickBooks Payroll Direct Deposit
For businesses using QuickBooks Payroll, you can simplify payments with QuickBooks Payroll Direct Deposit. This feature ensures:
- Employees and contractors are paid on time.
- All payroll records are automatically linked to 1099 reporting.
- Reduces manual entry errors when printing 1099 & 1096 forms.
Using direct deposit along with QuickBooks Desktop printing ensures seamless financial management and tax compliance.
Conclusion
Printing 1099 & 1096 forms in QuickBooks Desktop 2026 doesn’t have to be stressful. By following the steps above and preparing your vendor information, you can file accurate forms on time. For hands-on support, you can call +1(866)500-0076 for guidance on QuickBooks Desktop 1099 printing or setting up QuickBooks Payroll Direct Deposit. With the right approach, tax season becomes smooth, efficient, and worry-free.
FAQs
Q1: Can I print 1099 & 1096 forms for free in QuickBooks Desktop?
A1: QuickBooks Desktop allows you to print forms using pre-printed IRS forms. You may need a subscription for full features, but trial versions can test printing.
Q2: What’s the difference between 1099 and 1096 forms?
A2: Form 1099 reports payments to contractors/vendors, while 1096 summarizes all paper 1099s sent to the IRS.
Q3: Can I e-file 1099 forms from QuickBooks Desktop?
A3: Yes, QuickBooks Desktop supports e-filing for 1099 forms, which is faster and reduces paper errors.
Q4: How do I correct mistakes on printed 1099 forms?
A4: Use QuickBooks to void and reprint the corrected 1099. Always double-check vendor details before resubmission.
Q5: Is QuickBooks Payroll Direct Deposit linked to 1099 printing?
A5: Yes, all contractor payments through Payroll Direct Deposit are automatically included in 1099 calculations.